
So I spent the weekend pulling weeds out of the space I’m using for this seasons new straw bale garden.
I thought you might be interested in checking it out ;-0 This is at my granddads place, the same garden I setup the past couple of years that you would’ve heard me talking about (I left it to go to weed over winter as I was a bit lazy)…
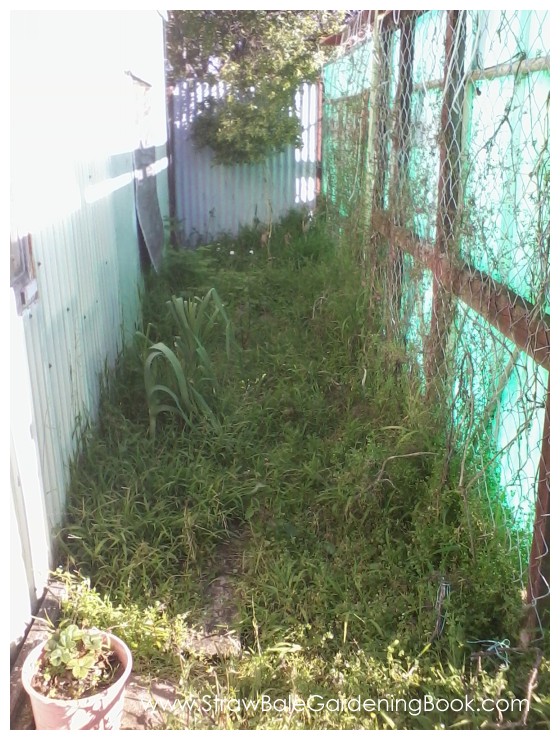
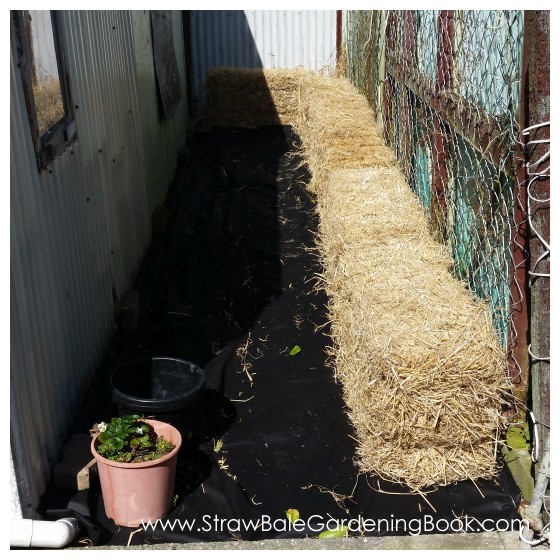
The space isn’t that big.
It’s roughly about 1.5 meters wide by about 4-5 meters long.
Nestled between an old sleep out to the left, and a paved patio area to the right.
It also doesn’t get as much sun as I would like either (the sun traverses left to right in the photo from sun up to sun down), but it was super productive last season anyway. And you have to make do with what you have. Anyway, the weeds are now gone, this weekend I’ll be setting up the straw bales and will send you some updates so you can see what’s happening as we progress.
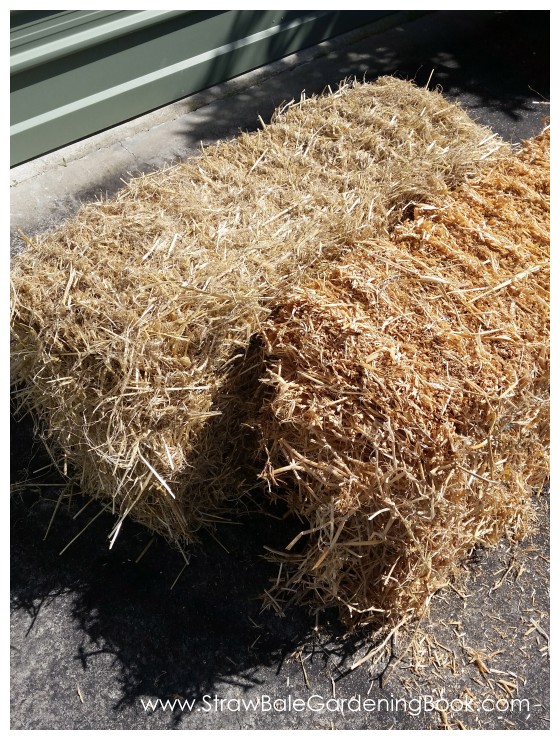
Dad and I went down to get our straw bales over the weekend. The one on the left is mine, the one on the right is Dads. I’m using barley straw, dad is using Pea Straw. What’s the difference? Barley straw is slightly more fibrous so it’s a bit more robust. Also, with Pea straw you’re going to get quite a few peas sprouting too. I can’t be bothered with that, but Dad didn’t mind and just got what he used last season…
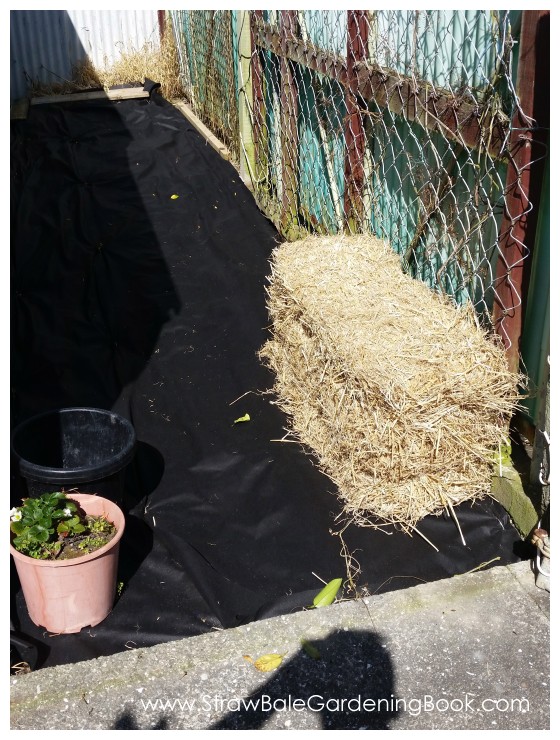
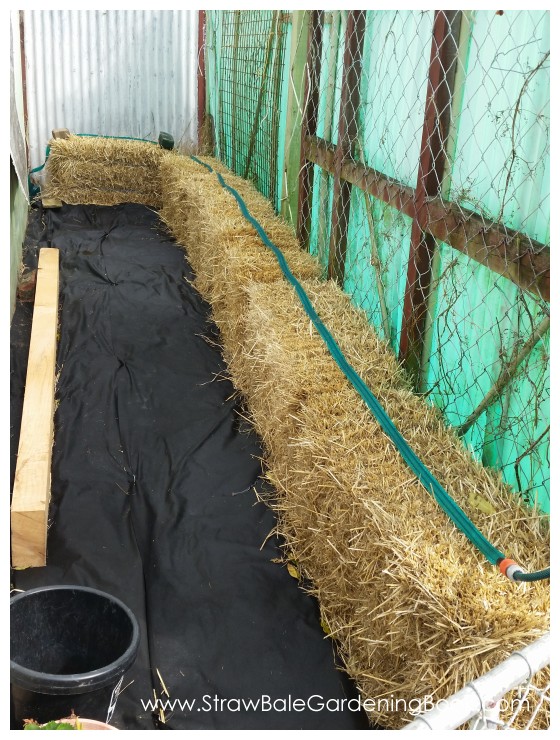
…here is the space cleaned up and the first bale in. Last week when the weather was too crappy to get the bales, I actually weed sprayed and then placed weed mat over the entire area and then left it for a week. You can see the weed spray worked well in the back corner there. No more weeds suits me and granddad fine…
…and here are all the bales in place. There are 6 in total…
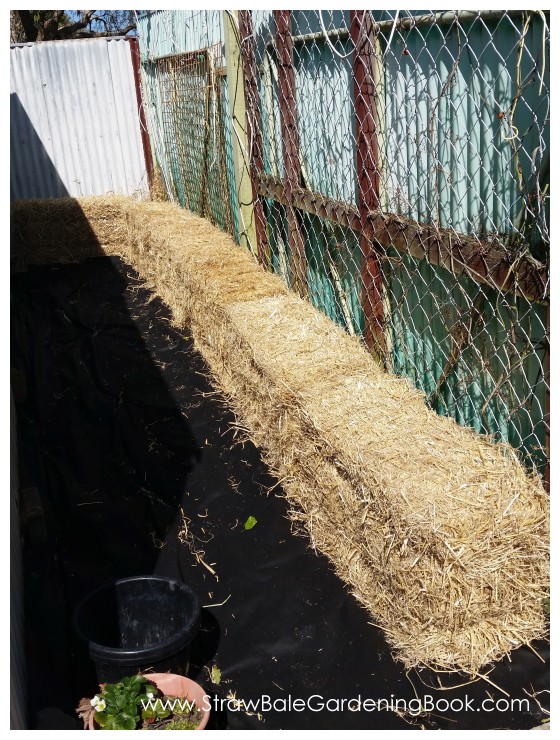
…there is actually enough room to run another 6 bales up the opposite side of the space, but I don’t think I’m going to bother (although I may do). It gets the same amount of sun – the shade in the picture on the left hand side was just the time of day. Also, where the bales are located was pretty much where I grew in the soil last year anyway.
Granddad was pleased, the space is a definite improvement on what its was. I’m sure you’ll agree. It’s nice, clean, and tidy and there aren’t going to be any more weeds to deal with (just one of the many benefits of growing in straw)…
I also started conditioning the bales yesterday. I brought a soaker hose to run across the top making the conditioning process way easier. These bales soak up a lot of water, and standing there with the hose takes awhile. However the photos are on my mums phone so I’ll have to get those one’s during the week to show you.
Here’s what Dad is doing…
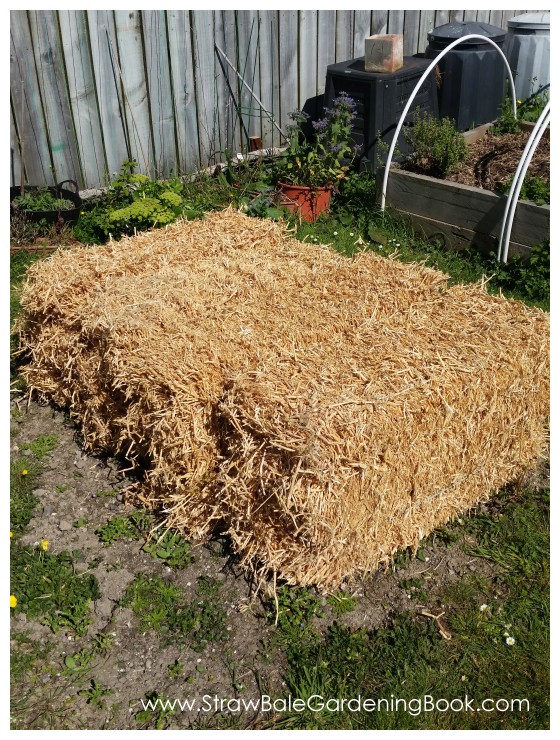
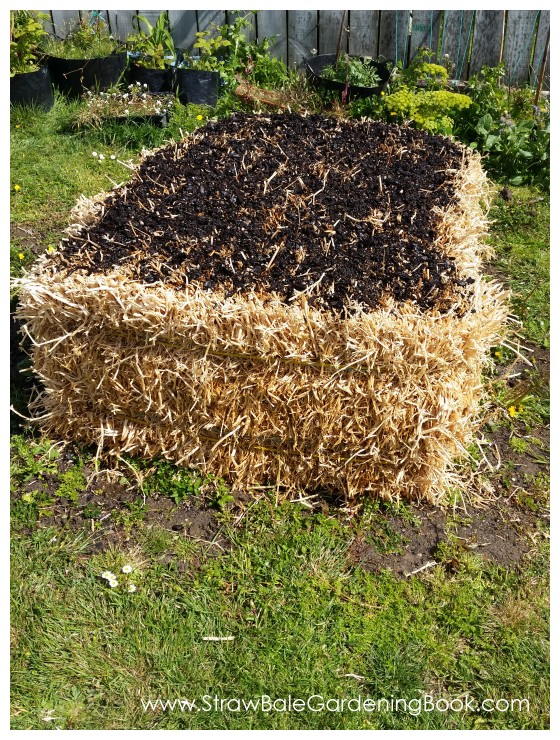
…they’re sitting on top of where we had a traditional bed last season. And although you can’t see it above (as we did it after I took the above photo) – we actually tied a thin rope around all 4 bales about 1/3 and also 2/3 of the way up to secure them altogether nice and snugly. And if you’re wondering, here’s what last seasons straw bales look like…
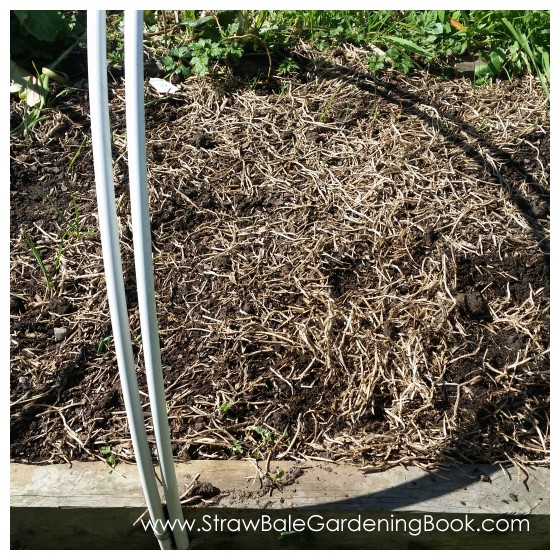
…they were added as mulch to the top of the traditional beds a few months ago (the compost bins were already full) and they have now largely disappeared…
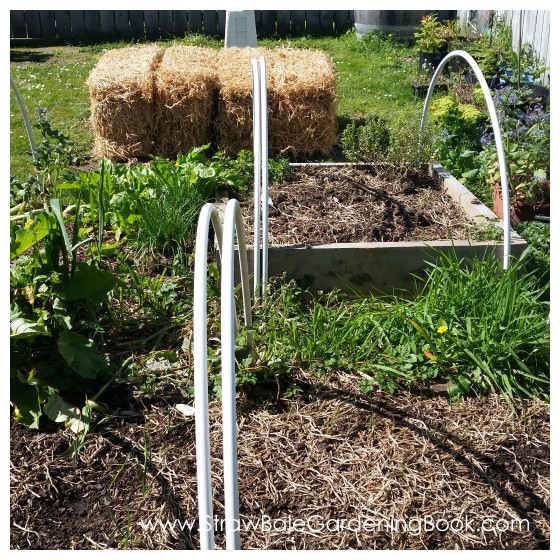
…all 4 bales from last season were placed on the top of the small garden area you can see above and have conditioned the soil there perfectly. So whilst there is an initial investment in getting the bales, you actually get to benefit from them twice – growing in them, and you’re also just pre-investing in next seasons compost and/or mulch ;-0
Both Dad and I have started planting.
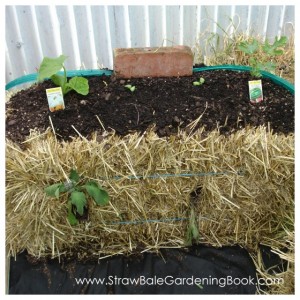
But unfortunately the photos on Mums phone (which showed this process) have gone walk about. This is the only one I could find of Dad’s garden. You can see we’ve tied a thin rope around all 4 bales to secure them together as one unit and make the whole bed a bit more robust.
Compost was also added to the top…
…after the above was taken, it was planted. I’ll have to get some more photos when I’m next up there to show you.
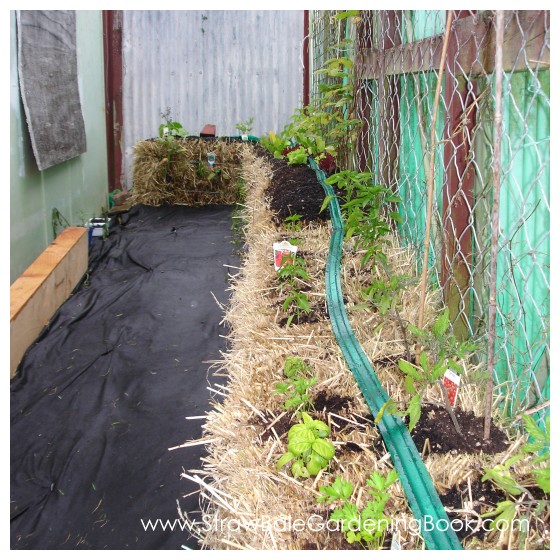
Here’s my garden….
You can see the soaker hose I’ve rigged up. It really helped with the bale conditioning process. Rather than standing there with a hose, I could just turn the soaker on for half an hour and let it do it’s thing…
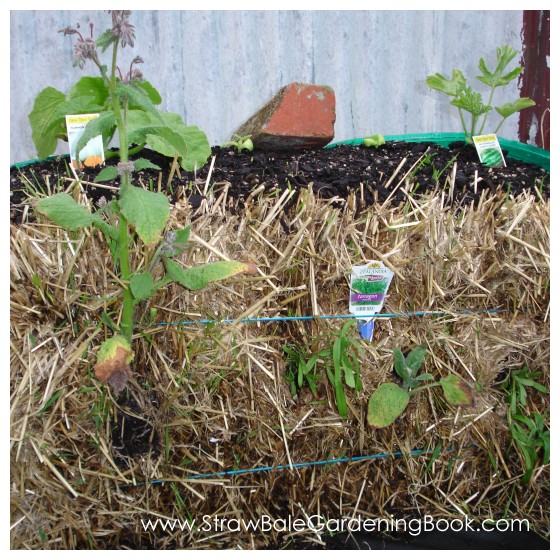
…here’s what it looks like planted…
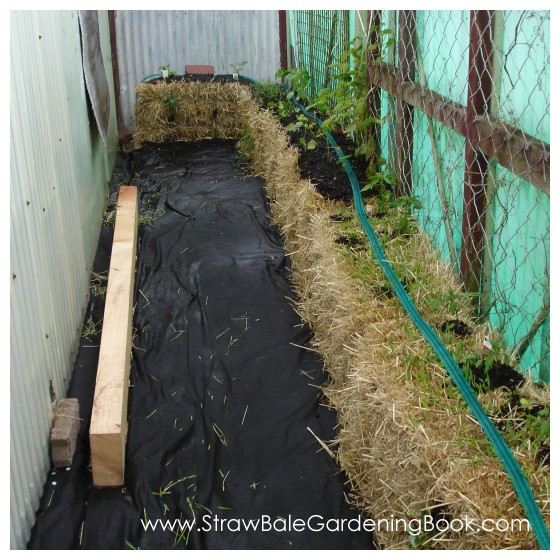
I’ve lucked out a bit with a couple of the bales – they were riddled with barley seed (you can see those in the foreground). So I’m just waiting for all of those little barley sprouts to get a little bigger (in a day or two) and will pluck them out. It’s pretty painless – they just pinch out (in fact, I’ve already done it).
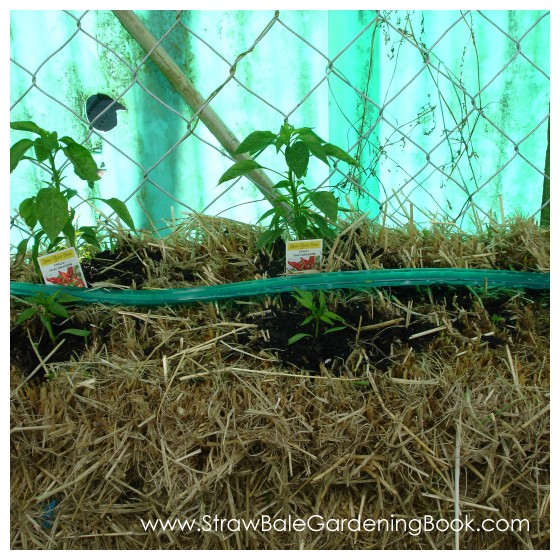
From the first bale in the foreground of the photo here’s what I’ve planted…
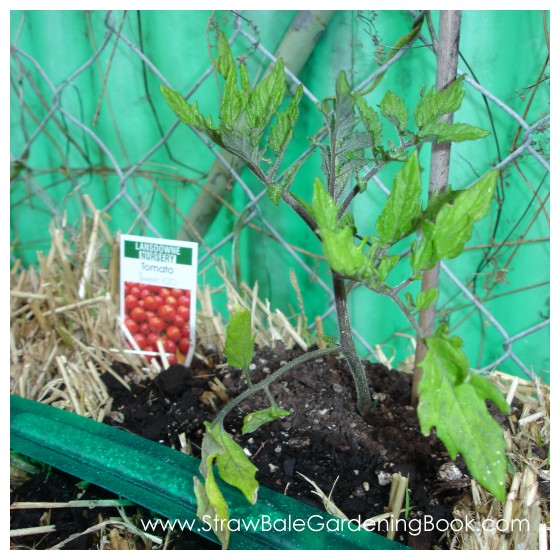
Bale One: In the top of the bale I’ve planted 3 Tomato Plants (and a sunflower) towards the back. I’ve yet to plant some basil in the front, but that’s the plan.
I’ve also planted a strawberry vertically in the side, which I’ll train to grow across the next bale as well (and I might start another from that one too)…

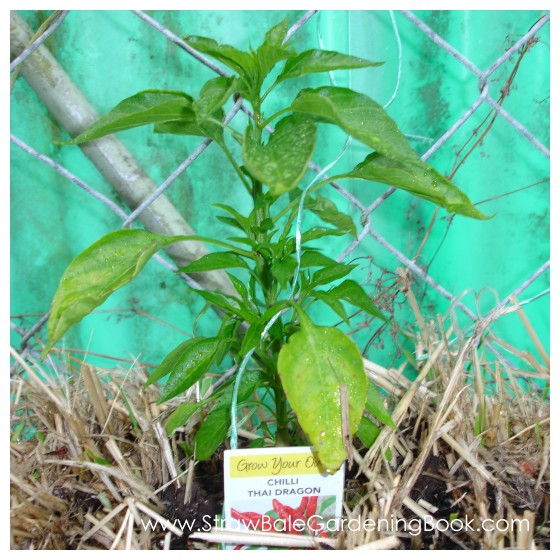
Bale Two: In the top of the bale I’ve planted 4 hot chilli plants to make hot sauce with. Two are Thai Dragon Chilli (really hot). There’s more room to play with here. I might get more chilli or perhaps some sweat peppers. I’ve yet to do anything vertically…
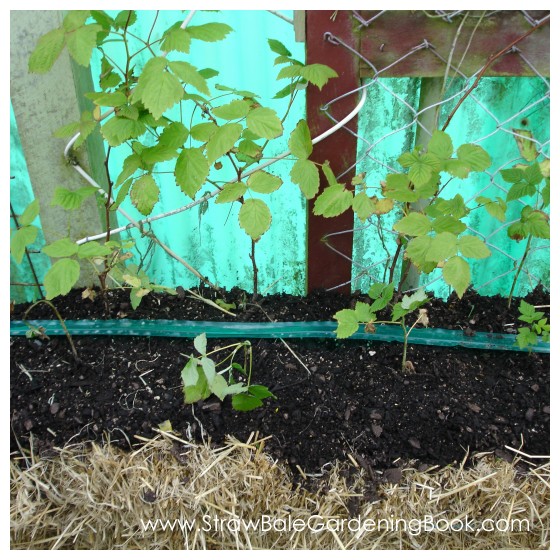
Bale Three: These are raspberry plants. I pulled these out of last seasons garden, and separated them into about 50 individual plants to give away. They were sitting in a bucket of water for a couple of weeks, and weren’t looking to good, so I’ve planted 8 in here in the meantime. I might keep them, I might take them out and put something a bit more productive in (but damn, they produce good berries). There’s nothing vertically…
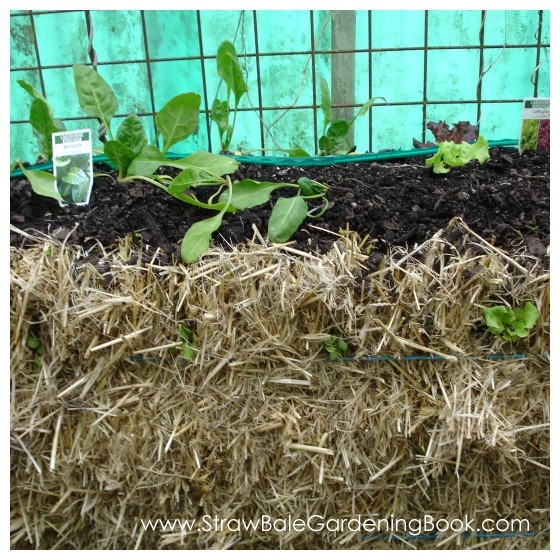
Bale Four: This is my salad bale. I figure it should produce enough for a fresh salad for the table a couple of times a week once it’s matured a bit . On the left hand side are approximately 8 perpetual spinach plants. On the right hand side I’ve got a variety of different lettuces (there are no “head” varieties – it’s all “take off leaves as needed”). It’s a little hard to see, but I’ve also planted some lettuces in the vertical sides as well…
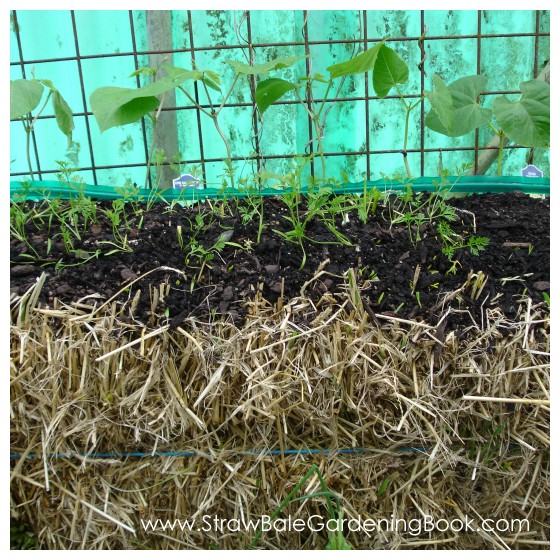
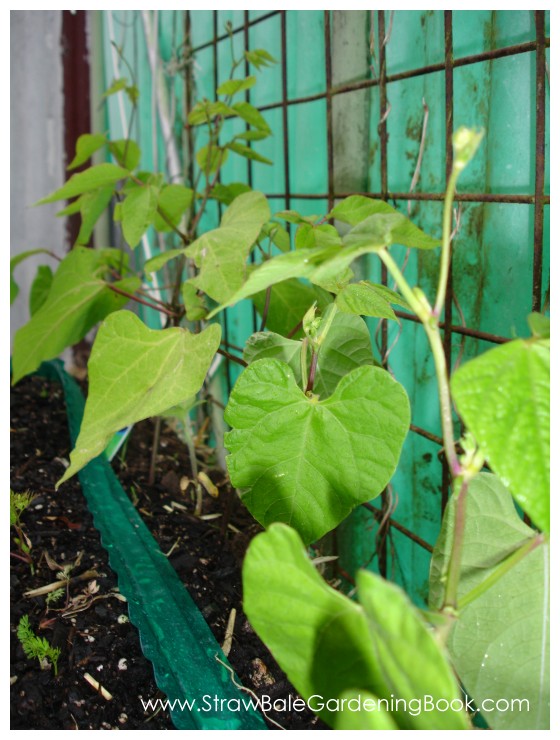
Bale Five: Along the back are runner beans. 5 scarlet runners, and 5 yellow butter beans. There is also another sunflower tucked away in there too. In the front of those are carrots. In the vertical sides (although it’s a bit hard to see) I’ve planted a Lemon Balm, some Chives, and a small sage plant…
Bale Six: This bale will be an interesting one. On the left I’ve got a pumpkin which I plan to train down a path that runs down the left hand side behind the building. On the right I’ve got a watermelon. I may need to rig that vertically so it has enough room (my sister asked how would the melons grow vertically – so I told her we would have to go shopping for a couple of bras). In between are two gherkin plants. All of these are great companion plants…

In the vertical side I’ve planted two Borage plants that I pinched out of Dads garden (it’s gone a bit wild there). Borage helps to bring in the pollinators and has edible flowers you can add to salads. Apparently you can also eat the leaves and they cook up and taste like spinach. The one on the left has taken and perked up, the one on the right might need replacing (the root system wasn’t the best but I thought I’d give it a chance)…

Borage actually grows pretty big, so “the idea” here is that it should grow large enough so as not to be overwhelmed by the pumpkin and watermelon leaves, which can also get really large. Will see.
And just because why not, here’s how I pruned my grandfathers apple tree this year…
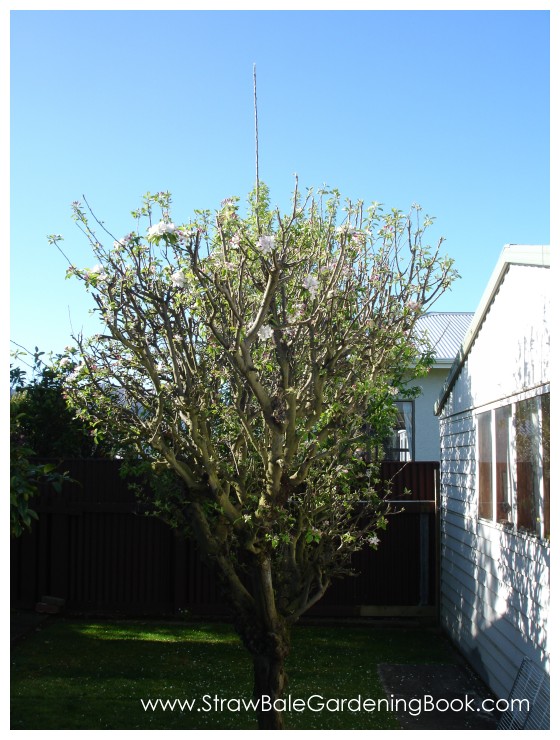
He finds it pretty funny (and said he wants to get a flag to fly from it), it’s winding my gran up a bit however…
Maybe I’ll turn the above photo of them into a flag, and bang it up there on Xmas day ;-0
That’ll get her going.
There’s actually plenty more room in the overall garden setup for more plants and I’ll be adding to it overtime.
I’ll send you some more updates as we grow.
Here are some photos of growth after around 3 weeks.
Right now the spring weather is still a little all over the place and we’re only averaging around 16 degrees C during the days. The garden is also only getting around 4-5 hours of sunlight on the sunny days. So it’s going to take a few more weeks of more stable and sunny weather before the garden really starts popping & growth takes off…
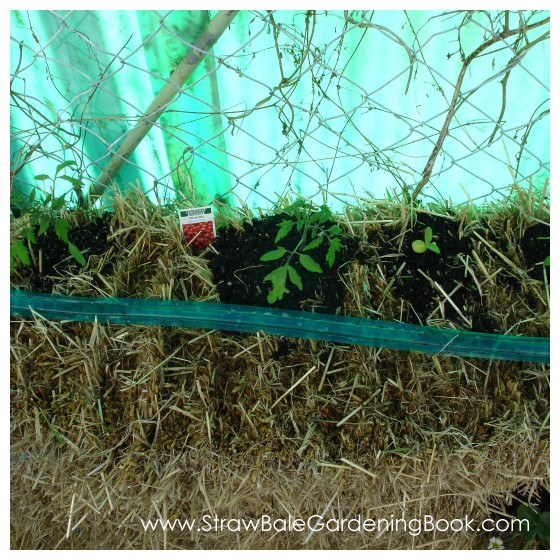
…above you can see the tomato plants in the foreground, and I’ve planted some Italian parsley and a few Basil plants in the front of those. Both good companion herbs. Behind those are the hot peppers. Following that you can see an empty space in front of the raspberry plants – I’ve actually sown radish and spring onions there on seed tape (about 5 days ago). Yesterday the radish were starting to germinate already. Here’s a little side by side comparison so far…


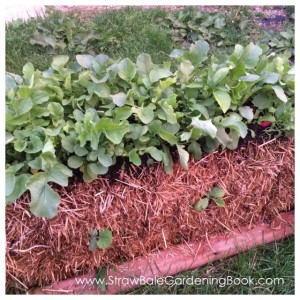
…here is my “salad bale” starting to slowly take off…
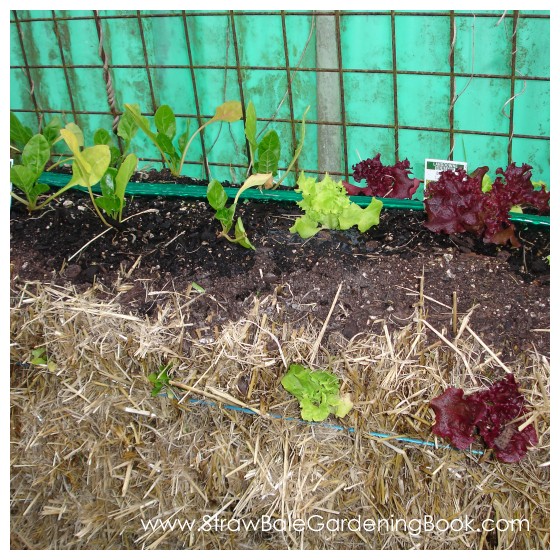
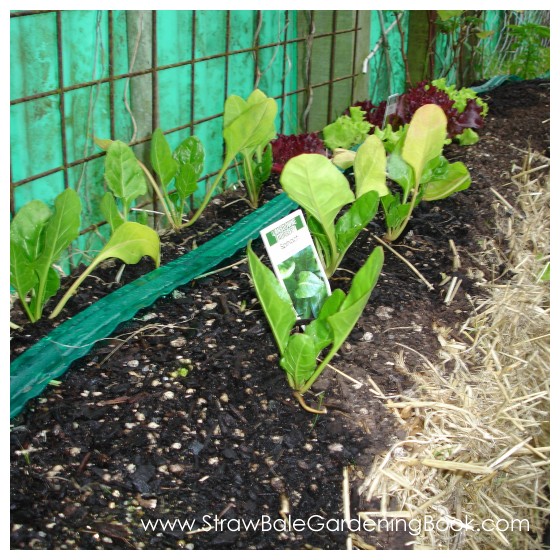
…it should be ready to start harvesting in another week or two.
My Thai Dragon Chilli Peppers are looking good…
…and my tomatoes, although still small, are starting to get some tiny laterals that will need pinching off soon…
…check out how good and healthy these beans look. There are scarlet runners and yellows & they’ve doubled in size since planting…
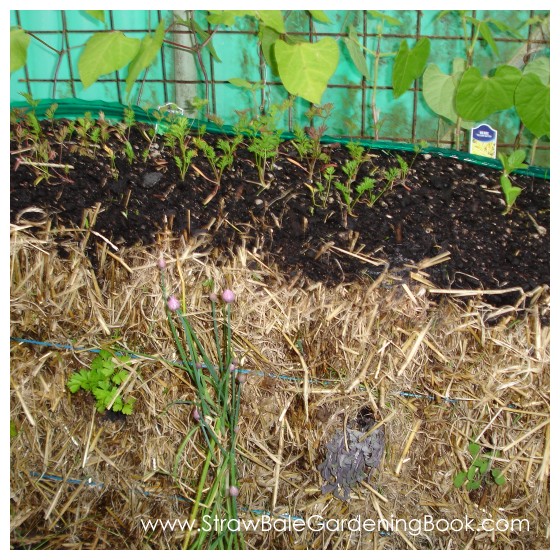
…this is a little out of focus, but you can see the beans at the back there, carrots in the front, and planted vertically in the sides from left to right you’ll see lemon balm (that’s actually just out of the picture), Italian parsley, chives that are absolutely loving it, some purple sage which was just added a few days ago, and a small regular sage plant…
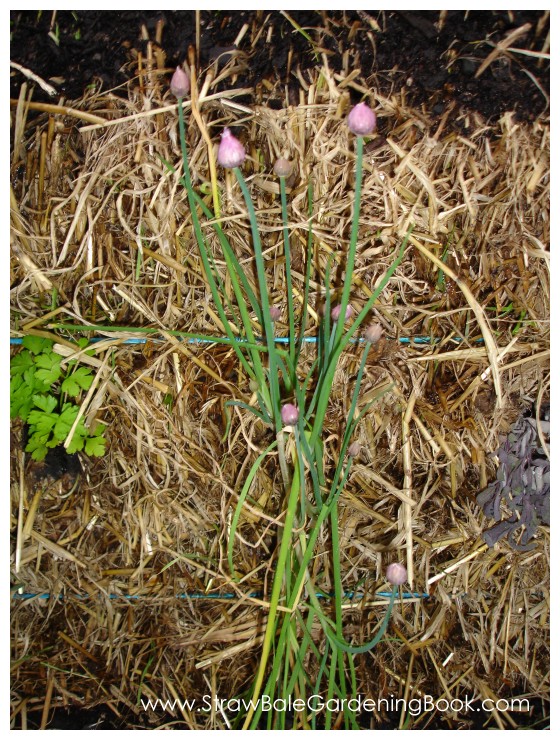
…here are the chives up close…
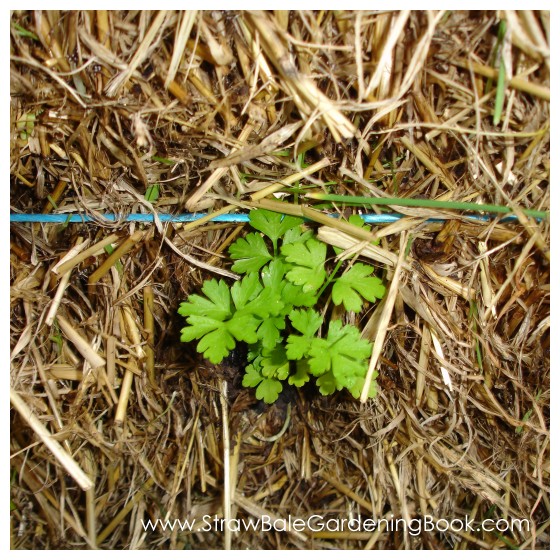
…the Italian parsley…
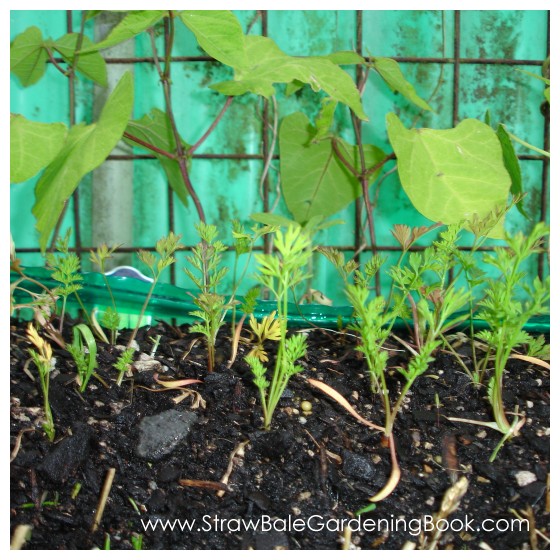
…the baby carrots…
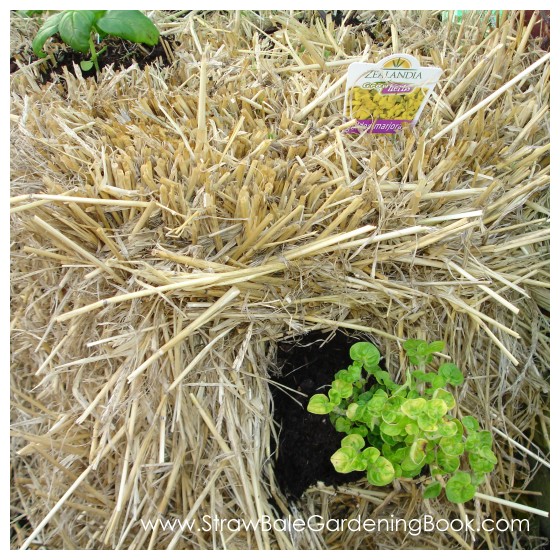
…here’s the borage planted into the bale with the pumpkin & water melon.
The one on the left has shot off like a rocket, the little one that I didn’t think would make it has hung in there and is going to be fine. The other two plants on the vertical sides are tarragon to add to my mixed herbs…
…check out what that borage plant on the left looked like just a few weeks ago…
…I’ve also planted a golden marjoram herb in the end of the first bale (it’s actually doubled in size since this photo was taken the other week)…
…and I don’t have a photo yet, but I have also planted Thyme vertically in front of the raspberry bale.
Both the Thyme & Marjoram grow as ground cover, so they should grow down and around their respective areas on the weed mat. All that remains is to acquire and plant some Rosemary as well to round off my mixed herbs.
I’m also going to get a few new strawberry plants to include as well (rather than waiting for a single plant to grow across two bales, I’ll get another 3 to have a better, faster yield).
Pretty clean, tidy and cool way to garden ;-0
I’m really looking forward to seeing the growth over the next few weeks as the weather improves.
If you want a step by step, practical and easy guide to doing this yourself…
Grow Healthy Organic Vegetables With Less Work
This digital guide is a simple, step by step, easy to follow plan to help you get started growing your own organic food & herbs in straw bales.
You’ll learn where & how to get straw bales at the best possible price. How to design & layout your garden for maximum productivity. How to condition your bales to create the perfect growing environment. How to companion plant vegetables & herbs to grow much healthier plants & reduce garden pests & diseases. How to manage your garden in only minutes per week & more…
You’ll have all of the information you need to get started with your own straw bale garden by this weekend (or this afternoon if you’re really keen).
Click the button below to order the “Straw Bale Gardening Book” now…